There’s a particular kind of mess that builds up around a study space. Highlighters that roll behind books, notebooks stacked in no particular order, cables draped across everything, sticky notes covering the monitor. A pegboard doesn’t just look tidy on the wall – it gives every item a place, which makes the whole room feel easier to work in before a session even starts.
For students, a well-organized space directly affects how a study session feels and flows. The setup doesn’t have to be expensive or complicated. A basic pegboard system, installed in an afternoon, can handle most of what accumulates on and around a desk over a semester.
Organization at Every Level
A study space works best when it’s thought about in layers. The desk surface handles what you’re actively working on. Drawers and shelves take care of what’s needed regularly but not constantly. The wall is for what should be visible and accessible at a glance – and that’s where pegboard earns its place.
The same layered thinking applies to how students manage their writing workload. A clear physical environment makes it easier to sit down and focus, but the written side of studying has its own demands. When everything is in order around you and a deadline still feels heavy, it helps to know that support is there. Some people find it useful to search “do my essay” and get guidance from a professional writer to use that as a solid starting point to build from. Reliable quality from a human writer gives a concrete model for structure and tone. Both levels of organization – the space and the work – feed into each other more than most people expect.
Choosing the Right Pegboard
Standard pegboard comes in two thicknesses: 1/8-inch and 1/4-inch. The thinner board works fine for lighter items – small notebooks, pens, lightweight organizers. For anything heavier, or for a system expected to hold up over years, 1/4-inch hardboard with 1/4-inch holes is the better choice. It accepts both 1/8-inch and 1/4-inch hooks, which gives more flexibility in what you can hang.
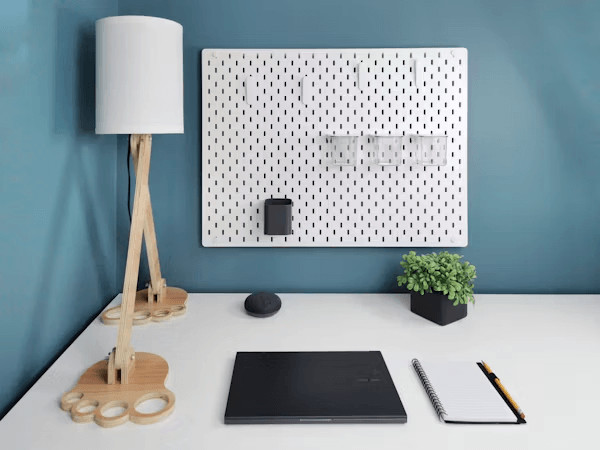
Metal and plastic pegboard are also available. Metal has a clean look and is nearly indestructible. Plastic often comes in panels designed to connect together, which suits larger wall configurations. For a student room or small study space, standard 1/4-inch hardboard is usually the most practical and affordable option.
Installation Basics
Pegboard needs about half an inch of space behind it so hooks can be inserted. The most reliable way to create this standoff is to attach 1×3 strips horizontally across the wall – one at the top, one at the bottom, and every 16 to 24 inches between. The pegboard screws into these strips rather than directly into the wall, which keeps it stable and creates the clearance needed for hooks.
A few practical points worth knowing before you start:
- Use washer-head screws rather than standard ones – the wider head holds better against the board
- On panels wider than three feet, add a support strip down the center to prevent bowing
- Paint the board before installing it – a coat of primer followed by semigloss paint makes it easier to wipe down, and applying it flat avoids drips into the holes
- Light coats matter here – thick paint clogs the holes
What to Hang and How
Standard hooks hold scissors, rulers, and headphone cables. Wire baskets attach to the board with hook clips and work well for loose items like index cards, pens, or stationery. A PVC pipe slipped over a longer hook becomes a holder for pencils or markers. Small shelves, made from plywood with 1/4-inch holes drilled in the back, slide onto L-hooks and can hold a calculator, a small speaker, or a stack of sticky notes.
One problem almost everyone runs into: hooks falling out when you remove something. The simplest fix is a dab of hot-melt glue on the lower leg before inserting the hook. It holds reliably but can be removed with a firm pull when you want to rearrange.
A Few Things Worth Keeping at Eye Level
Your most-used study items should be the easiest to reach. For most students that means: a pen, a highlighter, headphones, and whatever you track time with. Put those at arm height directly in front of you. Everything else can go higher, lower, or to the side.
Organizing by Study Zone
A pegboard works best when organized around how a specific person actually works. A few layout approaches worth considering:
Keeping related items together makes the board more intuitive to use. A student who always reaches for highlighters and their planner at the same time should have both in the same area of the board.
Add a Small Whiteboard or Corkboard Panel
A whiteboard panel mounted on the pegboard with hook clips is one of the most useful additions for students. Write the week’s priorities on it, a few key terms you’re reviewing, or the deadline you need to keep in sight. It takes up no desk space and stays visible the whole time you’re working.
Keeping It Flexible
The real advantage of pegboard over fixed shelving is that nothing is permanent. As a semester progresses and the materials change, the board can change with it. A hook that held a cable in September can hold a reference card in November.
A good habit is to do a quick reassessment at the start of each term. Pull off what’s no longer relevant, add what the new semester requires, and touch up if the board has taken on some marks. A pegboard treated as a living system rather than a one-time installation keeps paying off for as long as the study space is in use.
Rotate Materials by Subject
If you’re studying multiple subjects, consider dedicating a section of the board to whatever you’re focused on that week. Move flash cards, reference sheets, and color-coded pens to the front when a subject is active, and shift them aside when it’s not. It keeps the board relevant without requiring a full reorganization every time your focus shifts.
Final Thoughts
Study spaces accumulate clutter because most surfaces have no system – things land where there’s room rather than where they belong. A well-set-up pegboard gives every item a place, which makes both setting up and clearing a study session faster. The initial install takes an afternoon. The benefit lasts for years.