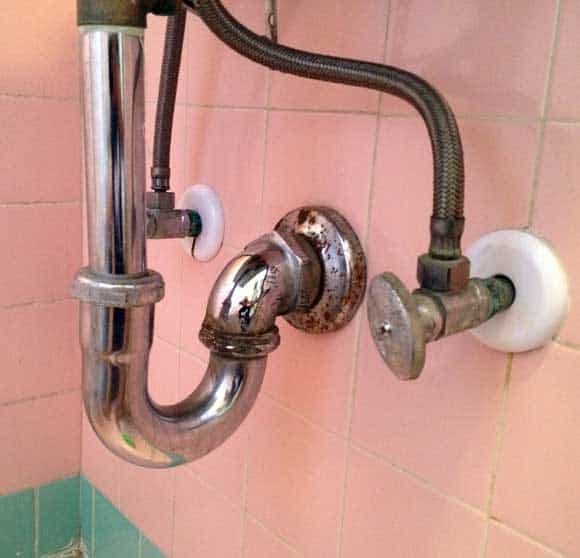
You fixed a leaking pipe, revived a dead laptop, or patched drywall so well you can’t even find the damage. Someone in your comments will ask, “How did you do that?” Your answer? Make a DIY repair video.
Shooting DIY repair content isn’t like filming unboxings or vlogs. You’re working in tight spaces, often with dust, poor light, and tools flying around. Here’s how to document your process without losing your mind or your viewers.
Pick A Repair Worth Filming
Good DIY repair videos start with one promise: what will be fixed by the end, and what a viewer will need to copy you. Choose a repair with a clean start and finish, not a four-day renovation where half the work happens off-camera. DIY repair videos are also engaging to watch, but they don’t fit the meaning of a tutorial that well.
A few examples that work well on a first run: fixing a faucet, patching a drywall hole, swapping a light switch, resealing a shower edge, fixing a loose cabinet hinge, cleaning a clogged sink trap.
Before you shoot, write a one-sentence goal and a viewer checklist. Not a script. Just the job, the parts, and the tools. That checklist becomes your on-screen list later (or your description on YouTube).
Set Up The Job Like A Small Set
Your setup has to do some of the organizing for you. Start by clearing the frame. Move random boxes, wrappers, and anything with personal info (mail, labels, documents). Then think about where the viewer’s eyes should go. If you’re filming a sink repair, angle the camera so the pipe connections are visible without your body blocking them every five seconds.
If you’re filming on a construction site (or even doing a home renovation that looks like one), plan where people will walk. Put your tripod somewhere it won’t get kicked, and keep cables taped down. The most useful shot is the one you can hold steady for the full step.

Gear That Survives Repairs
A phone is fine if you stabilize it. A cheap tripod, a clamp mount, or a small stand will beat handheld footage every time. If you have an action cam, it’s great for tight spots and overhead angles.
Now the repair-specific part: protecting the camera from dust matters more than people think. Dust sticks to lenses, gums up buttons, and gets into ports. A simple setup works:
- Use a clear zip bag with a hole for the lens (tape the edges so it doesn’t flap).
- Keep a microfiber cloth in your pocket and wipe the lens often.
- Don’t set your camera on the floor. Put it on a shelf, a stool, or a tool case.
- If you’re sanding, drilling, or cutting, pause the camera or move it farther away. You’ll still get the key visuals without coating everything.
If your job includes demo work, treat it as shooting in harsh conditions: dust, vibration, loud noise, sudden movement, and occasional “oh no” moments. The more you plan for that, the less footage you’ll lose.
Audio: Make Your Voice Easy To Understand
A small lav mic plugged into your phone (or a wireless one) is the simplest fix. Clip it high on your shirt, away from zippers and hoodie strings. If you can’t use a mic, record voiceover later in a quiet room or use an AI voice generator to ensure your instructions are professional and easy to follow, especially if your on-site audio is too noisy.
When you’re working with loud tools, don’t try to talk over them. Say what you’re about to do, run the tool, then explain what happened. That pattern keeps the video easy to follow.
Lighting Without A Studio
Use one strong light source close to the work area. A clamp work light or a small LED panel helps a lot. Bounce the light off a white wall if direct light creates harsh glare on metal pipes or glossy tiles. If you’re under a sink, put the light inside the cabinet aimed upward and slightly to the side, not straight at the camera. That gives texture and makes parts readable.
Also, lock your exposure if your phone supports it. Otherwise, the camera will constantly brighten and darken when your hands move, which makes the footage tiring to watch.
Shoot The DIY Repair So Editing Is Easy Later
Think in steps. Each step should have a wide shot that shows where you are and a close shot that shows exactly what your hands are doing.
A simple trick: after you finish a step, hold the result still for two seconds. Tightened fitting, patched hole, installed part, pause. Those little holds become natural cut points during video editing.
Also, shoot short safety cutaways. Close-up of power off at the breaker. Close-up of water shutoff valve. Label on a part. These clips save you later when you need to explain something without redoing the whole DIY repair.
A Simple Editing Workflow
Your goal is to remove dead time and make the steps easy to replay. Start by dumping all clips into your editor and sorting them by step. Then trim walking to the toolbox, long screwdriver turns, searching for a wrench, etc. If you want the fastest cleanup, a video trimmer online can work for quick cutting and saving shorter clips before you move them into a full editor.
Add three things and stop there:
- Step labels on screen (Step 1, Step 2, etc.)
- Short text callouts for measurements or part names
- Optional voiceover if your on-site audio is messy
If you’re posting to YouTube, add chapters (timestamps) in the description. It’s one of the easiest ways to make a DIY repair video feel rewatchable, especially when someone’s hands are wet and they just need to jump to the right moment.
Use Screen Recording For Diagrams And Settings
Not every repair step is “hands in frame.” Sometimes the important part is a diagram, a checklist, or a settings menu that viewers need to pause and copy. That’s when a screen recorder for PC makes sense. Record a short clip where you zoom into a wiring layout, highlight the exact connection order with your cursor, or show a quick step checklist with measurements, drying times, or mix ratios. It’s much clearer than trying to film a paper manual or a phone screen, and it keeps the “don’t miss this” info inside the video instead of burying it in the description.
Screen recording is also useful for repairs that include software steps, like pairing a smart thermostat, checking an error code, or changing an app setting.
Upload For YouTube And Repurpose For Social Media
For YouTube, your title should match a real search: “How to Replace a Bathroom Faucet Cartridge” is much better than “My Faucet Journey.” Put the tool list and part numbers in the description. Add one clear thumbnail: the broken part in one hand, the replacement in the other, with a short label.
Then repurpose for social media without doing extra work. Pull 15–30 seconds showing the before, key step, and after. Add a caption and point people to the full video. Short clips are basically ads for the full tutorial, and you already have the footage.
Before You Post
Watch your video once on your phone with the volume at 50%. If you can’t understand the steps that way, a viewer won’t either. Check that the lens stays clean, your hands don’t block the key action, and every step has a visible result.
If you get those basics right, you’ll end up with repair content people save, share, and actually use because it helps them finish the job.