Protect yourself and your belongings first, contain the water, document the damage, and arrange a temporary cover; then get the roof properly inspected as soon as it’s safe. Don’t climb onto a wet roof, and don’t assume a stopped drip means the problem is solved.
A roof leaking during a heavy rain can feel like an emergency, and it often is. In Southern California, where storms can be intense but infrequent, many roofs go months without being tested, so leaks tend to show up all at once. Here’s a practical plan for the first day.
Step 1: Stay Safe
- Stay off the roof. Wet roofs are slippery, and falls cause serious injuries. Wait until the rain stops and a professional can assess it.
- Watch for electrical hazards. If water is dripping near light fixtures, ceiling fans, or outlets, turn off power to that area at the breaker. Don’t touch wet electrical fixtures.
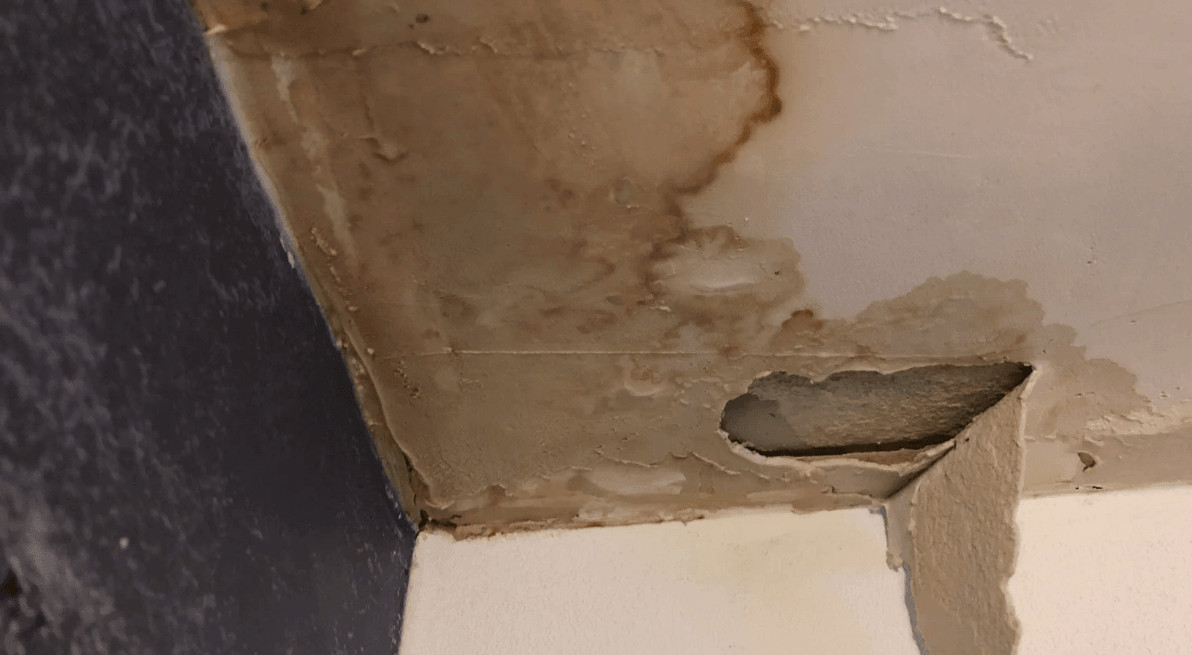
- Look for sagging. A ceiling that bulges or sags is holding water and could collapse. Keep people away from that area.
Step 2: Contain the Water From a Roof Leaking Into the House
- Move furniture and valuables out of the way, or cover them with plastic.
- Place buckets or containers under active drips. A towel in the bottom stops splashing.
- Release water from a bulging ceiling carefully. If a ceiling is bulging with water, you can poke a small hole in the lowest point with a screwdriver, standing to the side, to let it drain into a bucket. A controlled drain is better than an uncontrolled collapse. If you’re unsure, leave it and call a professional.
- Lift rugs and protect floors, especially hardwood, which can warp quickly.
- Use towels and a wet vac to remove standing water.
Step 3: Document Everything
Take clear photos and short videos of the leak, the damaged ceiling and walls, and any affected belongings, and note the date and time. Record what you noticed before the leak, such as stains or sounds. This record is useful if you need to explain the problem to a roofer, and for your own files.
If you plan to file a homeowners insurance claim, let your insurer know early and keep receipts for any temporary repairs. Photos, the date and time of the leak, and a list of damaged items make the claim easier to support.
Step 4: Find Where the Roof Is Leaking, If You Can Do It Safely
To find the leak source, you can check the attic, if you can reach it safely, with a flashlight. Look for wet insulation, water stains on the underside of the roof deck, or daylight coming through. Leaks often travel along rafters and show up far from where water enters the roof, so the stain on your ceiling may not be directly under the problem. Don’t tear out insulation or deck material to chase the source in the middle of a storm.
Not sure the water is coming from the roof? Ceiling stains that darken or spread after rain, peeling paint, a musty smell, and drips near light fixtures are common signs of a roof leak. A stain that keeps growing in dry weather may be plumbing instead.
Common entry points include:
- Damaged or missing shingles or tiles
- Cracked or lifted flashing around chimneys, vents, and skylights
- Clogged gutters or valleys
- Roof penetrations with failed seals
- Flat roof seams or ponding areas
Step 5: Arrange a Temporary Cover
Temporary measures can limit damage until the weather clears and permanent repairs can be made.
- A tarp secured properly over the damaged area is the standard emergency fix. It should be fastened to the roof beyond the leak, and weighted or secured so it doesn’t flap in the wind. Because this requires getting on the roof, it’s best done by a professional.
- Roofing cement or sealant can patch small, accessible holes once the surface is dry.
- Don’t use makeshift materials like plastic sheets held down with random objects. They can blow off and cause more damage.
Step 6: Dry the Space
Water that sits in insulation, drywall, and framing can lead to mold within a day or two. Run fans and a dehumidifier, open windows when the weather allows, and remove wet insulation or drywall if it’s soaked. If the water was extensive, a water mitigation professional can help dry the structure.
Step 7: Get a Professional Assessment
A temporary fix isn’t a repair. Once it’s safe, have the roof inspected so the actual cause is found and fixed. A thorough inspection looks at the roofing material, flashing, penetrations, and the deck. Ask for photos and a written explanation of what’s wrong and what the options are. For an emergency, a reputable roofing contractor can respond quickly and explain what needs to happen next.
Roof repair costs depend on what’s causing the leak, the type of roofing material, and how much damage needs fixing. Minor issues, such as loose flashing or worn sealant, generally cost less than repairs involving damaged shingles, underlayment, or roof decking. Costs can also vary based on roof accessibility and local labor rates. Before hiring a contractor, ask for a written estimate that breaks down labor, materials, and any additional charges.
What Not to Do
- Don’t climb on a wet or steep roof.
- Don’t ignore a small leak. They don’t fix themselves.
- Don’t sign a contract under pressure because it’s an emergency. Temporary protection is one thing, a full replacement is another, so take time to compare options.
- Don’t pay the full amount upfront.
Ways to Reduce the Chance of a Leak Next Time
- Clean gutters and clear debris from valleys before the rainy season.
- Schedule a roof inspection once a year, and after major storms.
- Replace cracked flashing and failed sealant promptly.
- Trim tree branches that scrape or drop debris on the roof.
- Fix small repairs early, before they turn into larger ones.
The Bottom Line
The first 24 hours are about limiting damage, not solving everything. Keep people safe, contain the water, document what you see, and get a temporary cover in place. Then bring in a professional to find the cause and fix it properly. A fast, calm response can mean the difference between a minor repair and a major renovation.