An avid snowboard collector and DIY enthusiast recently inquired about our 1993 Burton Jeff Brushie Pro model we used in our how-to for hanging a snowboard that we shared with Apartment Therapy last year.
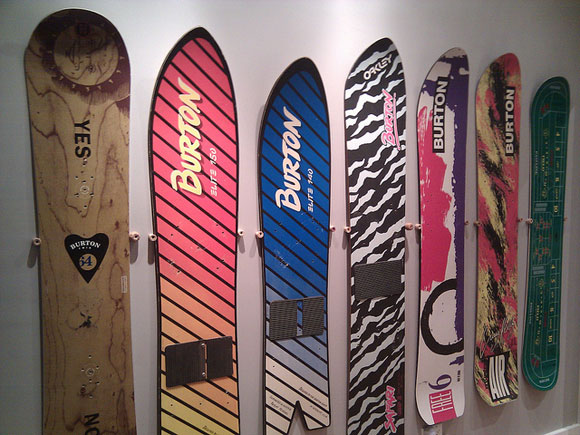
We’re keen on keeping this board so unfortunately we couldn’t add it to their collection but they did share with us a photo of their vintage snowboard collection held in place via our cork method. They’ve definitely got a thing for Burton and have acquired quite a collection.
The Jeff Brushie craps table board is a great graphic and the Craig Kelly Air is an all-time favorite that perfectly captures the aesthetic of that generation. Not to mention the Elite 150 swallowtail which is a true classic. These all look like they could still rip!
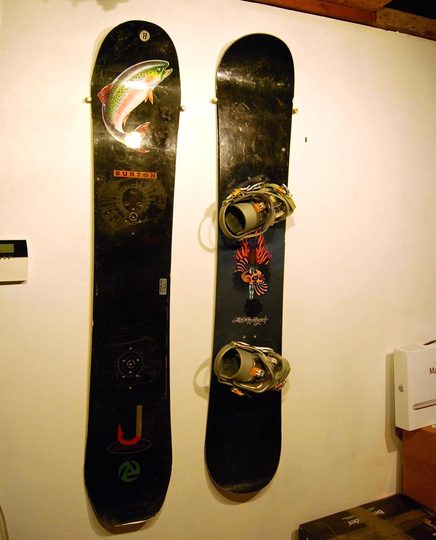
Here’s the how-to for displaying your own quiver.
Equipment/Tools
* Two small corks or rubber grommets
* Two 2″ self-tapping screws
* Two drywall anchors
* Ruler or measuring tape
* Level Screwdriver
Instructions
1. First, gather your materials and determine where you’d like the board to hang.
2. Measure your snowboard across the top at it’s widest width. Our board was 11″ across. Mark two points on your wall at this widest width. Use a level to make sure the points are exactly across from each other.
3. Install your drywall anchors. You may not need anchors if you’ve removed the bindings from your board and you are using drywall screws. Take the screws and drive them through the exact center of your cork stoppers or rubber grommets then place the screw and stopper against the marked point on the wall and drive it through the anchor or drywall.
4. Make sure your anchor points are now even with each other and are solid into the drywall. If they are uneven start over.
5. Take your snowboard and raise it bottom side to the wall and gently lower it from the center to the wides point where it will catch on your cork or rubber anchors.
6. Sit back and admire your new snowboard storage/display that took less than $5 in materials and 15 minutes to setup.
photo: Chelsa Skees

