Professional window installation looks deceptively simple from the outside. Watch a crew work and it seems like they’re just lifting a unit into an opening and screwing it down. What actually separates a clean, fast job from a slow and leaky one is equipment – the right tools, used the right way.
Many DIY guides focus heavily on the installation steps while giving less attention to the tools needed to complete them accurately. In Boise, where windows have to perform through hot summers and freezing winter weather, small fitting or sealing errors can become noticeable over time. So before you sign off on a window replacement project in Boise, it helps to know what equipment installers commonly use and what each tool contributes to the job.
Why the right tools actually change everything
A professional crew isn’t fast just because the installers are skilled – they’re fast because the process is built around equipment that eliminates guesswork. Laser levels check three planes at once. Foam guns apply controlled, even pressure. Caulking tools produce consistent beads. Each tool solves a problem that costs time and money if you skip it.
Consider a typical 15-window job. Nobody managing that kind of project shows up with a cordless drill and optimism. Crews invest in equipment because poor installation shows up later as drafts, sticking sashes, and water damage behind the trim. When you hire an experienced installer, a good share of what you’re paying for is the equipment that prevents those problems in the first place.
Essential professional window installation tools
Professional-grade laser levels ($150-400) offer durability and multi-plane accuracy for high-volume work. For single windows, a quality consumer model ($50-80) provides sufficient accuracy, though it requires more manual calibration. A window that’s off by a quarter-inch creates compounding problems – stress on the glass, air leaks, water infiltration. Installers use lasers to check plumb, level, and square simultaneously, which takes seconds instead of the 20 minutes a homeowner spends fussing with a standard level.
The difference becomes obvious after installation. A square window operates smoothly for 20 years. An off-square window gets harder to open annually until it won’t budge by year five.
Pry bars and removal tools
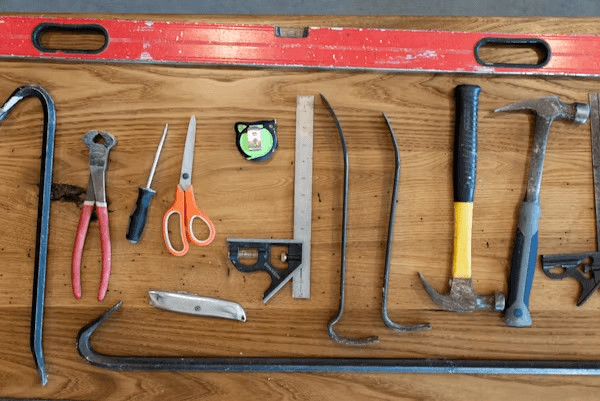
Removing the old window is where things get destructive fast. Professionals use flat pry bars (2-4 inches) with protective padding, plus oscillating multi-tools with cutting attachments. The goal isn’t speed – it’s extraction without cracking surrounding drywall or damaging the frame. Inexperienced people often punch holes in walls because they don’t have proper leverage.
The right removal tool protects what you’re keeping (the wall, the sill, the trim) while safely extracting what you’re replacing.
Expanding foam guns
Here’s a tool that separates pros from DIYers. A basic expanding foam gun costs $15-30 and looks simple, but cheap application leads to problems. Excessive foam expands and bows the frame inward; too little leaves gaps. Professional-grade dispensers apply controlled pressure – the difference between a sealed installation and one that fails in five years.
Professional application looks precise – like someone frosting a cake. Small, measured bursts. Then trimmed excess. When you’re paying someone $500+ for installation, foam application quality actually matters.
Caulking and sealant systems
A quality caulking gun ($25-40) makes the difference between smooth, professional beads and messy work. Pros keep three or four loaded with different sealants – some for exterior application under the frame, others for interior weatherproofing. Using the wrong sealant means it fails during the first freeze-thaw cycle.
Window fitting tools: the overlooked essentials
| Tool | Cost | Why It Matters |
| Shim Stock (cedar or plastic) | $5-10 | Precise leveling without creating gaps or movement |
| Finish Nailer (casing nailer) | $80-120 | Secure trim without splitting wood or leaving marks |
| Utility Knife (sharp) | $8-15 | Clean caulk cuts and professional-looking trim work |
| Oscillating Multi-Tool | $50-150 | Cuts old caulk, trims shims, handles detailed work |
| Cordless Impact Driver | $60-150 | Precise fastening with adjustable torque control |
Shims: the unsung heroes
Small cedar or plastic wedges fill gaps between the window frame and rough opening. DIYers often use cardboard scraps or whatever’s handy. Pros carry pre-cut shim sets because the frame won’t sit perfectly plumb without them. This detail determines whether your window moves over time or operates smoothly for decades.
Impact driver and torque control
A cordless impact driver ($60-150) is standard equipment, but torque control matters. Strip fasteners with too much force and the frame gets damaged. Pros adjust settings based on material – different pressure for vinyl, wood, or aluminum. This takes experience, which is why hiring someone trained in these details pays off.
The oscillating multi-tool
An oscillating multi-tool ($50-150) handles 30% of the work. It cuts old caulk, trims shims flush, and manages trim work without requiring multiple tools or extensions. It’s the tool that separates a full day of work from a half-day job.
What works for DIY window projects (without overspending)
You don’t need $5,000 in equipment to replace one window, but you need the essentials:
- Quality laser level – $50-80 (non-professional grade, but accurate)
- Pry bar set – $30-40
- Caulking gun + exterior caulk – $25 total
- Expanding foam gun – $20
- Drill-driver with impact setting – $60-80
- Sharp utility knife – $10
- Shim stock – $8
Total investment: ~$245-255 for tools that actually work.
Real Math: A professional installation for one window costs $500-800. For three windows, you’ve already justified the tool purchase. But after the first project, these tools get used for other home projects for years.
The honest conversation about hiring professionals
The decision between DIY and professional installation depends on your comfort with the process, available time, and whether you’ll use the tools again. Each approach has trade-offs. When you see someone offering quality professional window installation services, the professionals investing in real tools have already made the calculation – equipment costs matter less than cutting corners doesn’t.
Perfectly good windows get ruined by inexperienced installation. Off-square frames stress the glass. Improper sealing causes water damage. Rushed caulking fails in two seasons. These tools aren’t just about speed – they’re about doing it right once.
If you’re evaluating contractors, ask what tools they use. Ask if they own their equipment or share it. Ask if they’ve invested in proper expanding foam guns instead of using aerosol spray foam. These questions reveal how professionals approach quality control and equipment investment.
Final take: tools define quality
Knowing what goes into a proper window installation changes how you talk to contractors — and how honestly you assess your own skills. You’ll understand why a crew carries a particular set of tools, and why skipping any of them shows up later as a draft, a stuck sash, or water where it shouldn’t be.
The installation procedure can also help homeowners determine their criteria when choosing a local contractor. For instance, Boise Custom Windows & Doors has a process that involves an in home call for measurement and evaluation, installation, and a walk through. This kind of staged method provides homeowners with helpful information they can discuss prior to any beginning work, ranging from how the opening will be cleaned up to how the finished window will be inspected.
A properly installed window should function, be well supported and create an appropriate barrier around the window. At the end of the day, the tools can be put back in the trucks, but the quality of work the tools helped produce will remain apparent anytime the window is opened, closed, or kept out of Boise weather.