Rock sliders are the first piece of armor that you should add to your off-road or overland vehicle. In this article I’ll show you how to install rock sliders, why you need them, as well as how to use them.
- Why Do I Need Rock Sliders?
- I Already have Side Steps, Do I need Sliders?
- How are Rock Sliders Built?
- How to Install Rock Sliders
- Lift Slider Into Position
- Position U-Bolts Around the Frame and Through Tabs
- Attach Washer, Locking Washer, and Nut
- Move Slider Into Final Position
- Tighten Nuts
- Test Steps and Measure for Accuracy
- How to Use Rock Sliders
Why Do I Need Rock Sliders?
Beefy front bumpers filled with winches and light bars and rear bumpers loaded with tire carriers and jerry can holders, get all the likes on social media, but it’s the understated rock sliders that will really protect your rig.
Steel bumpers serve a purpose to protect the front of your vehicle from animal strikes and obstacles, hold a winch securely in place, provide a tow point, and serve as a mount for lights. Rear steel bumpers also serve as a tow point, body protection, and a place to store gear.
These are all great features that most off-roaders covet, but these bumpers are expensive and add a tremendous amount of weight to your vehicle before you even load them up with a winch or tire. Front and rear bumpers can also make it difficult to park as your vehicle is longer and the rear access is more limited with swing-outs.
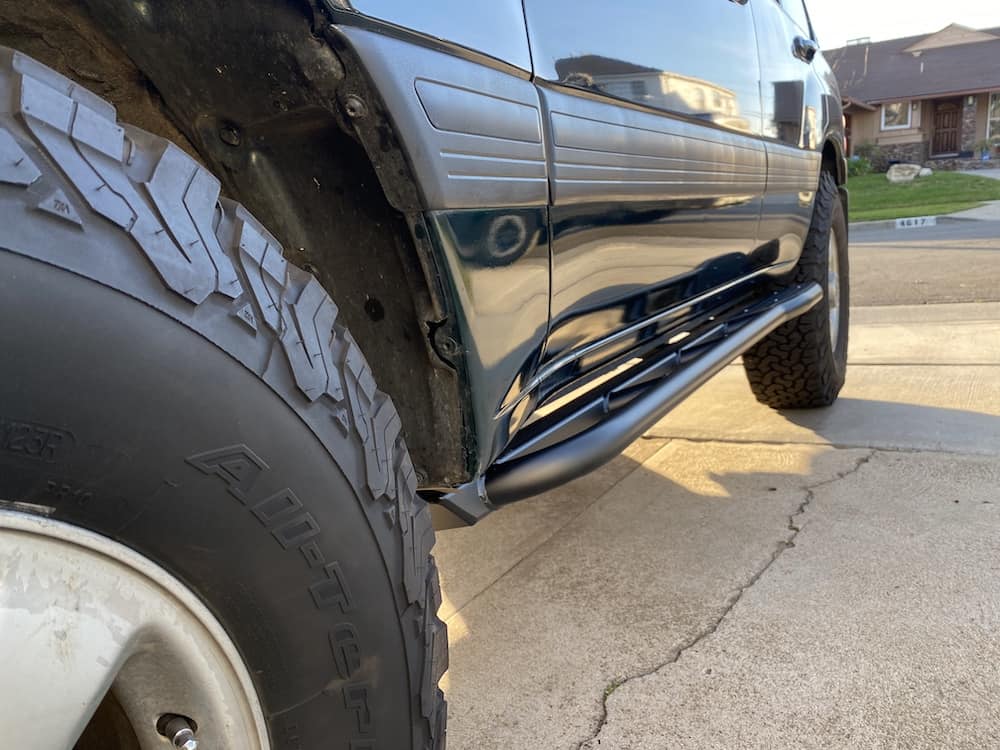
So the best bang for your buck in terms of value and use is the rock slider. Rock sliders protect the lower portion of your vehicle that includes the rocker panels and door panels, from debris that may get kicked up while driving, and most importantly from large obstacles and rocks that you are driving over.
Instead of your vehicle dropping off of a large rock and subsequently grinding over it, causing thousands of dollars in damage, a rock slider simply absorbs the impact and allows you to “slide” off the obstacle without causing body damage.
Because they are treated to this type of abuse, a rock slider must be designed and built to support the weight of your vehicle crashing down on an obstacle. This answers the next question.
I Already have Side Steps, Do I need Sliders?
The answer is yes! Side steps are helpful for getting in and out of your vehicle, but they should only be used as steps. They are typically made of fiberglass, and if you come down hard on them, the weight of the vehicle will crush and tear them and they can damage your vehicle.
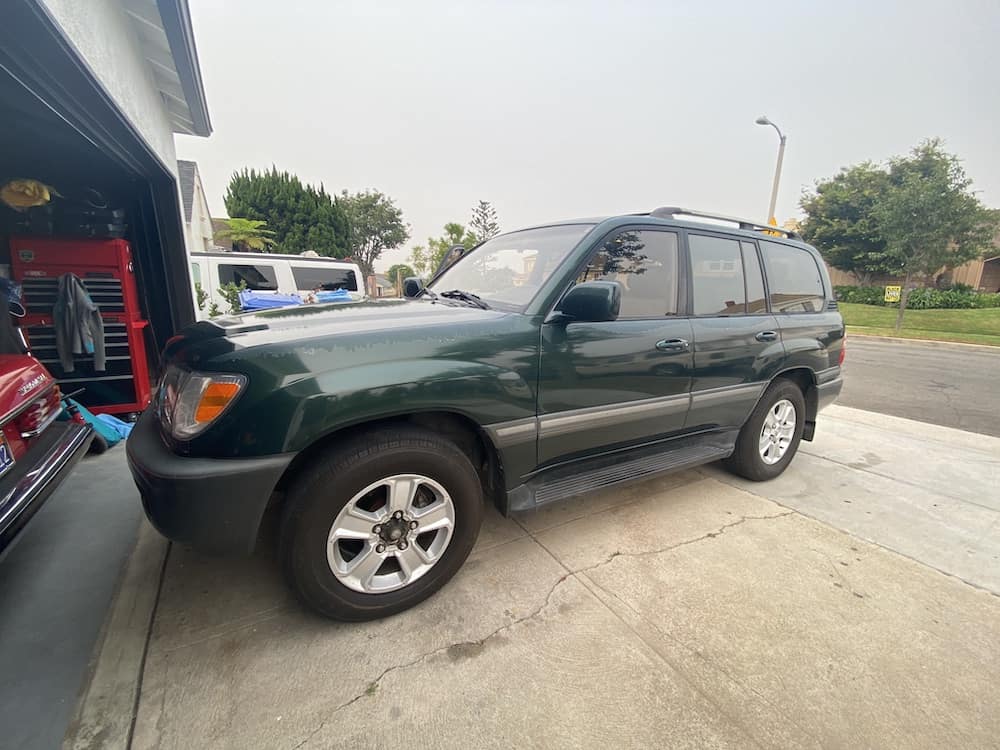
Nerf bars are another type of step, but these are built from steel and can look like a rock slider, but they aren’t. I had a set of Westin nerf bars on my 2000 F-150. They bolted into the factory step mounts on the body of the truck but they were not designed to hold the weight of the vehicle, and they also came out along the side and not the bottom.
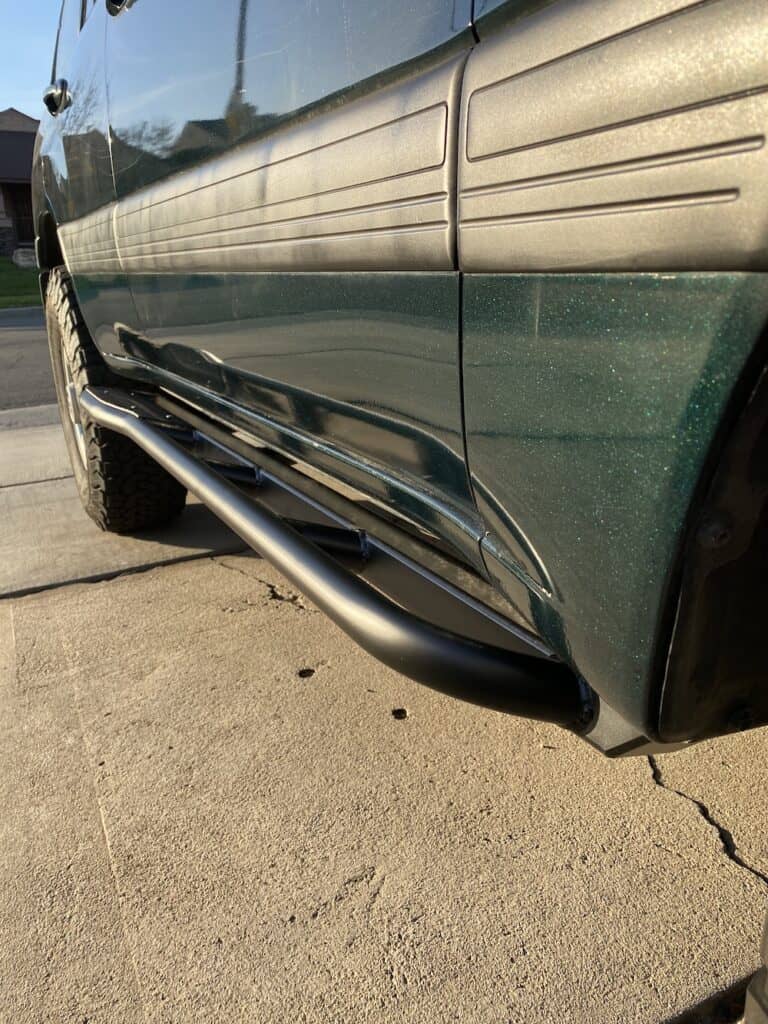
If you need help identifying the difference between rock sliders and side steps, take a look underneath the vehicle and see how they are attached. Sliders will be bolted to the frame of the vehicle with burly hardware, or welded directly to the frame.
Steps will usually be bolted into nuts mounted on the underside of the body of the vehicle and they will structurally be much less rigid and thick.
How are Rock Sliders Built?
Rock sliders are custom built using round or square metal tubing, sometimes both. DIYers with welding skills can build rock sliders at home using whatever gauge steel they have, but I purchased a set of White Knuckle Rock Sliders that are built to the following specs.
- 3/16″ thick x 2″ x 3″ rectangular tube main rub rail for greater foundational strength
- 3/16″ thick x 1-1/2″ square tube legs to limit flexing while traversing obstacles
- .120″ thick x 1-3/4″ outer rub rail with kick-out at the rear to assist in pushing away from obstacles
- 3/8″ thick heavy-duty mounting plates
- 1/4″ thick gussets for added strength
These White Knuckle sliders are beefy, but I don’t feel they are overbuilt or too heavy. They are about 60 pounds each and because they span the the middle of the vehicle the weight is distributed evenly across both front and rear suspension setups.
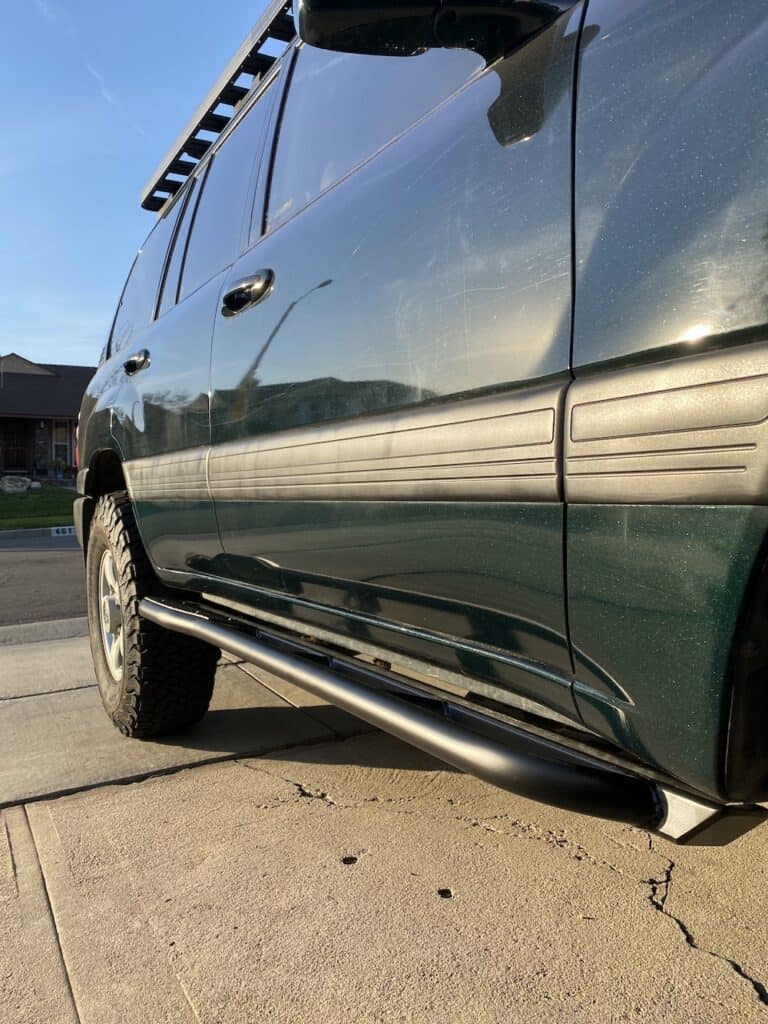
In addition to the steel gauge and shape, you can choose between different levels of steel strength. The two options are HREW (hot rolled electric welded) and DOM (drawn over mandrel). The differences in strength between these two options is derived from how they made.
HREW is standard mild steel that is used in a ton of everyday applications. It has a yield strength of around 40ksi.
DOM steel is seamless and put through a secondary process where the tube is cold drawn over a mandrel that results in a more consistent and stronger tube. It has a yield strength of around 70ksi.
I chose to go with rock sliders made from DOM steel. The drawback to DOM is that it is more expensive and the lead time for sliders can take longer as many builders keep an inventory of HREW sliders but build DOM sliders on request.
How to Install Rock Sliders
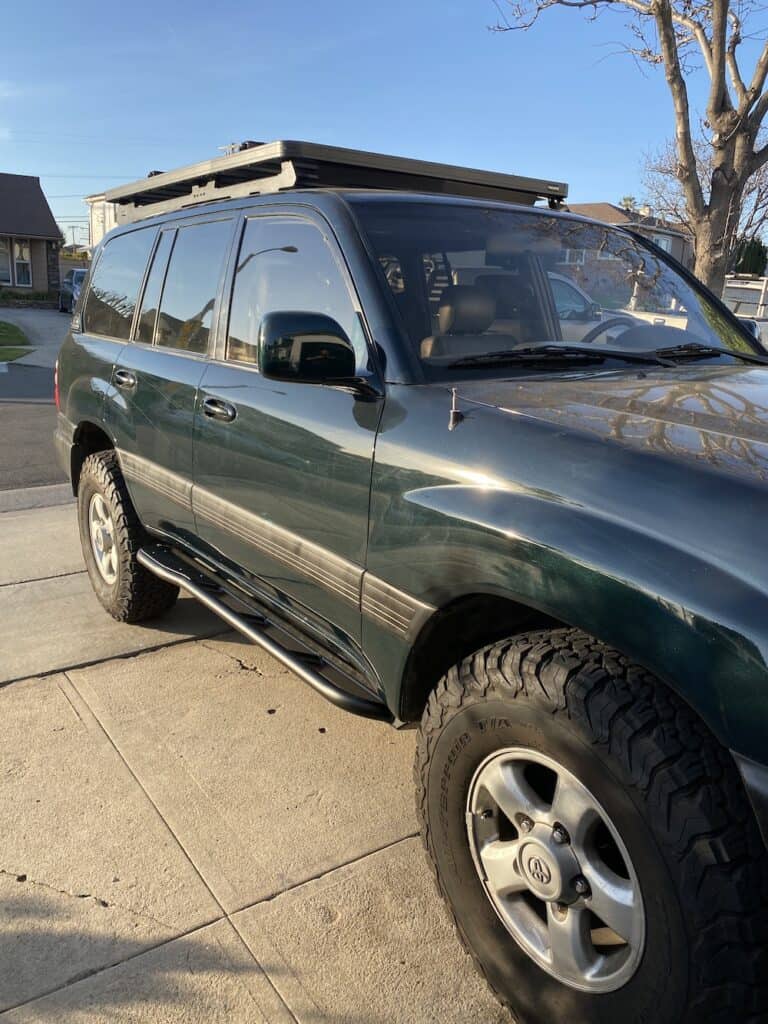
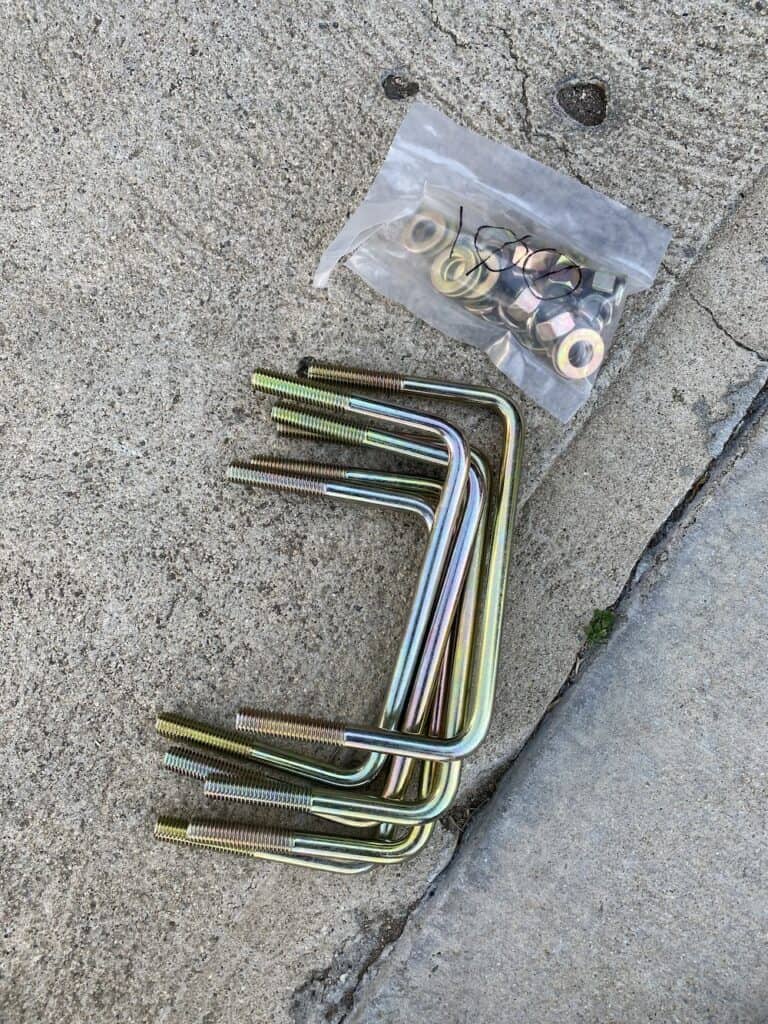
Rock sliders can be installed on a vehicle by bolting on large u-bolts through the frame and attaching them to tabs on the slider, or by welding these tabs directly onto the frame of the vehicle.
Welded on sliders are the strongest option, but they require welding skills or hiring someone, and they are harder to setup and there is no room for adjustment.
Bolt-on sliders are now commonplace and I’ve heard zero complaints about their performance compared to welded on sliders. There are a few different manufacturers that make sliders for my Land Cruiser 100-series, but I’ve always been keen on the design and features of the White Knuckle sliders.
White Knuckle can add a top diamond plate over the entire slider to make it easier to step on, or on just the rear bump out, which is what I did. This cover will make it easier to step up to access the roof rack and my kids will be able to climb into the back seat easier.
Here are the steps to install rock sliders.
- Lift slider into position
- Position u-bolts around frame and through tabs
- Attach washer, locking washer, and nuts
- Move slider into final position
- Tighten nuts
- Test step and measure for accuracy
The tools needed to install rock sliders are a hydraulic floor jack, jack stands, 3/4″ ratcheting wrench, 3-foot board.
Lift Slider Into Position
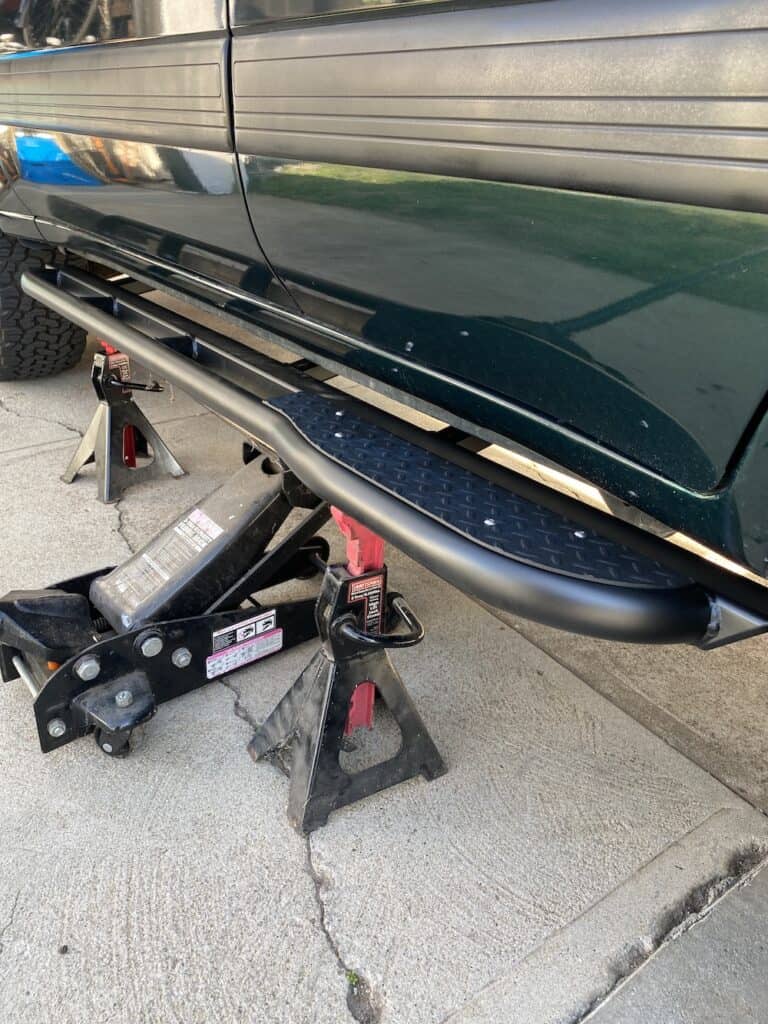
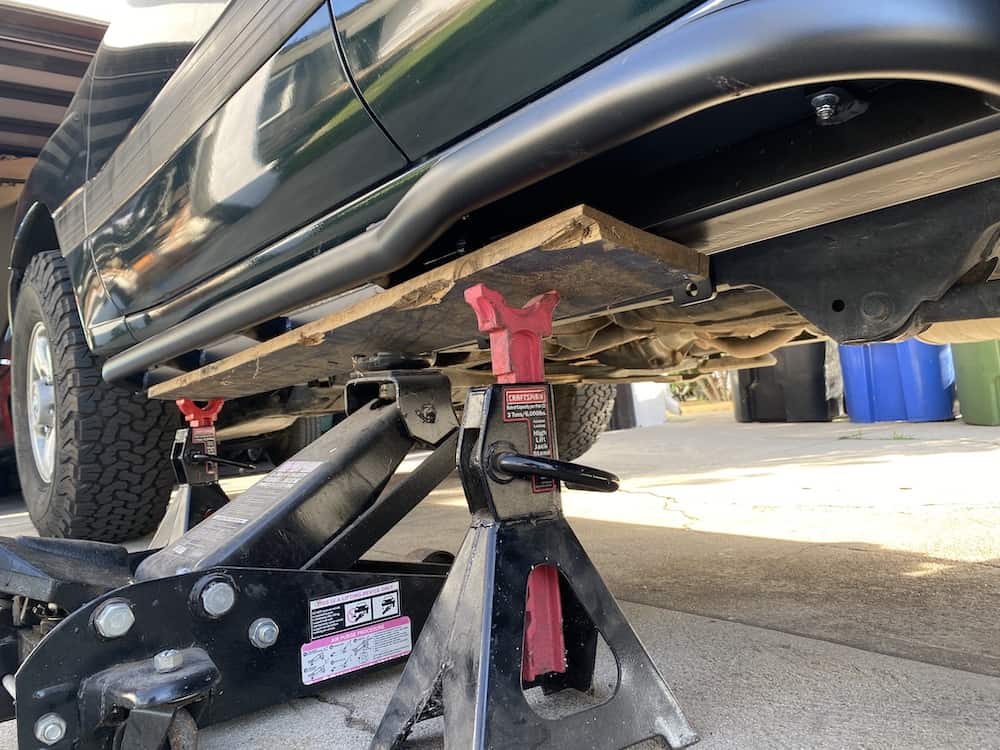
Place a board on top of the floor jack and then gently place your slider on top of the board. The board will help make it easier to balance your slider on the jack.
Use the jack to slowly move the slider into place underneath your vehicle and lift it into position. Use a jack stand on each side to help balance and support the slider.
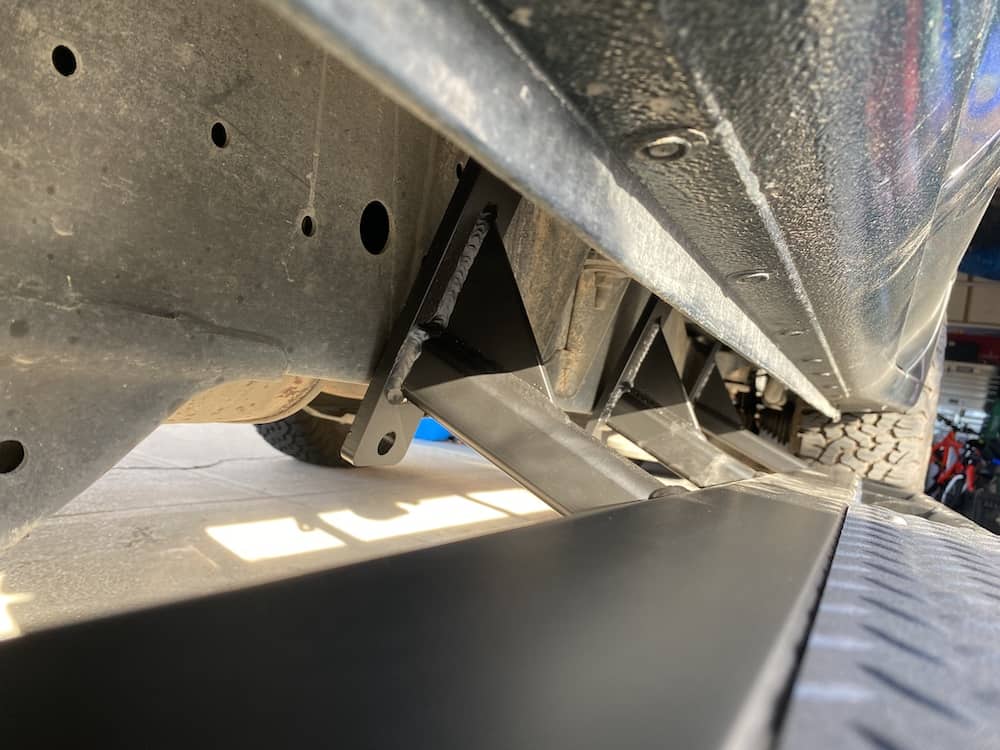
You want the tabs on the slider to line up nicely against the frame of your vehicle with space for the holes to accept the u-bolt.
Take your time and get the slider positioned correctly, as it will be much harder to manipulate the slider once you have a bolt on.
Position U-Bolts Around the Frame and Through Tabs
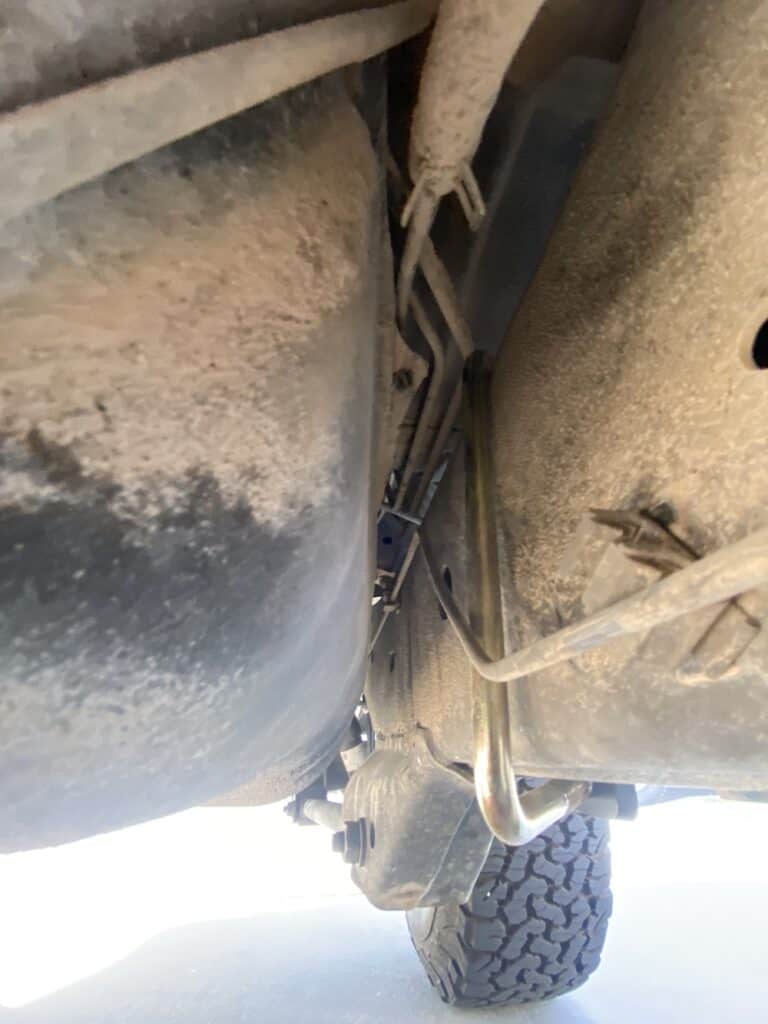
Once you’ve got the slider well supported, you can then slide the u-bolt around the frame and through each end of the tab on the slider. The White Knuckle sliders have three tabs on each slider and one u-bolt for each tab.
On the 100-series Land Cruiser, you need to take carefully reposition the brake line on the driver’s side that is secured to the inside of the frame. Gently pull the brake line away from the guides that are holding it into place and slide the u-bolt underneath it. Do not place your u-bolt over the brake lines or they will get crushed and you will lose your brakes.
Attach Washer, Locking Washer, and Nut
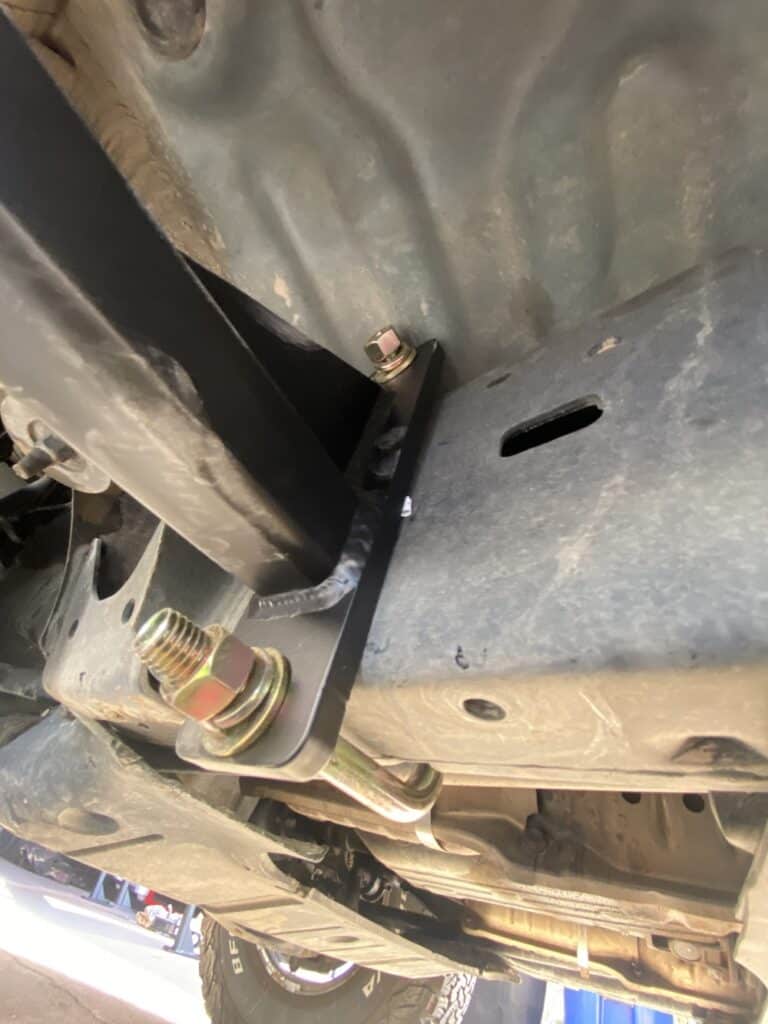
Once you’ve got the u-bolts pushed through the tabs you can secure them in place using a washer, locking washer, and nut. My u-bolts took a 3/4″ nut that I secured in place with a ratcheting wrench.
You want to first secure all the nuts loosely, then make sure the slider is positioned correctly beneath your rocker panel. This one was designed to be flush with the front of the rear wheel well.
Move Slider Into Final Position
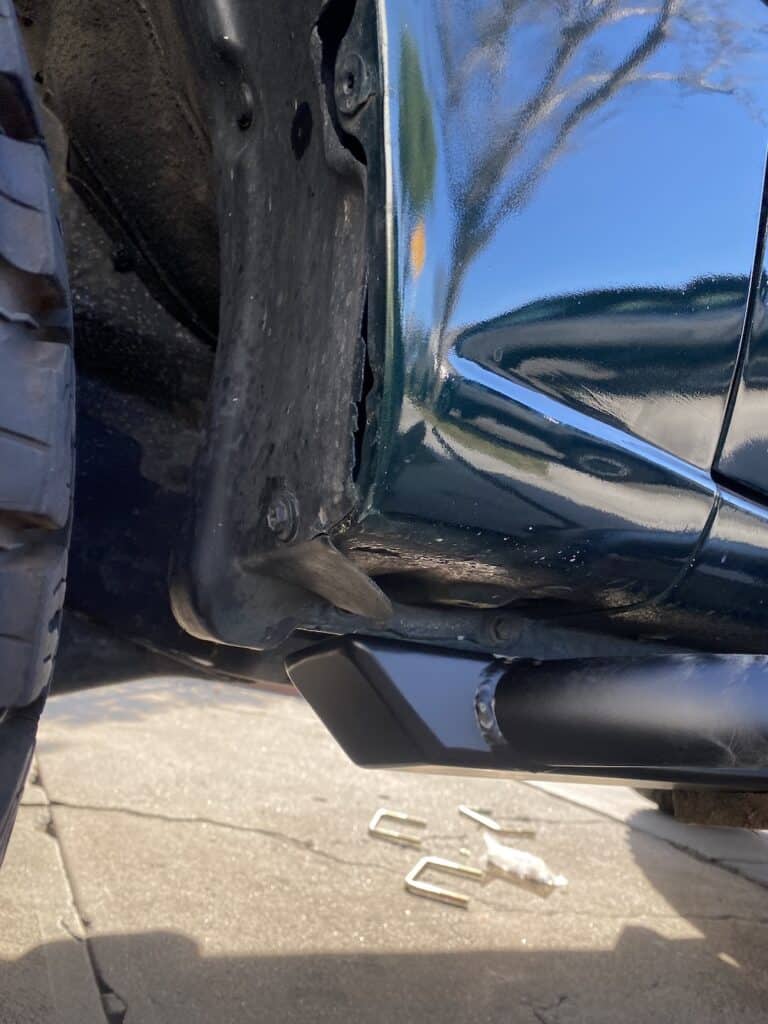
You also want to make sure the sliders have 3/4″ to a 1-inch gap between the slider and the rocker panel. If you position the sliders to close to the body, you’ll get squeaks when the vehicle flexes.
The easiest way to move the sliders after they have been lightly bolted on, is by lightly tugging on them from one end. You can also use your floor jack to help push the slider up and into place.
Tighten Nuts
This process takes time as you need to then tighten the top nut a bit and then the bottom nut. Try to tighten everything evenly and move to the next u-bolt before you tighten everything in place little by little.
Once you are certain the slider is in a good position you can hand tighten every nut as tight as you can.
Test Steps and Measure for Accuracy
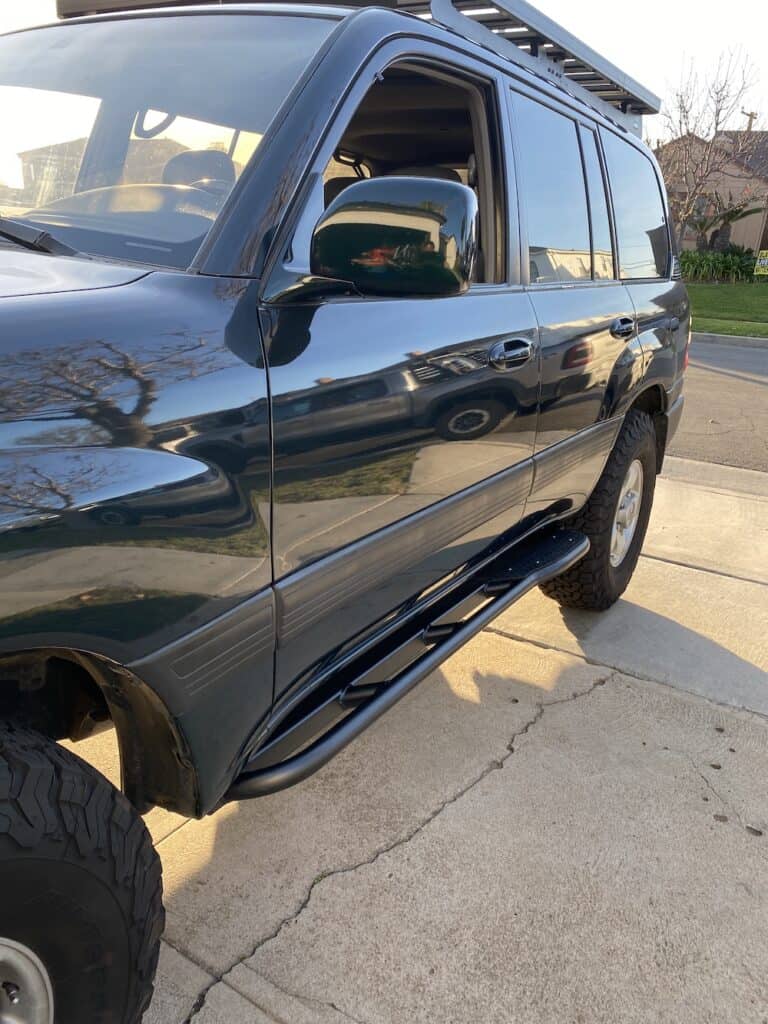
Once everything is tightened up, you can test it by stepping on the slider and bouncing up and down on it. You should feel the truck move, but not the slider.
Take final measurements to ensure the slider didn’t move out of position as you were tightening it down. If it did shift, you’ll need to loosen everything a bit and start over.
How to Use Rock Sliders
The step test you can perform in your driveway, but the true test of a rock slider is on the rocks!
Here’s a great example of RSG sliders protecting a 4Runner on the Cleghorn trail here in the LA area.
Without the sliders the body and doors on the 4Runner would have been crunched, costing thousands of dollars.
The spotters here did the best they could to minimize the damage. This is a situation where at least they had the sliders, but larger tires with a lift would help with the approach and departure angles, and front and rear bumpers with higher clearance would also prevent damage. Skid plates would also come in handy here.
Rock crawlers effectively use their sliders all the time to maneuver around and over obstacles. They know how to pivot their vehicles using the sliders.
Here’s a Tacoma using RCI bolt-on sliders to great effect.
And finally a 100-series Land Cruiser puts its White Knuckle Off-Road sliders to the test.
Most bolt-on rock sliders perform the same, but look for real world examples on YouTube showing them in action, and check the forums and local 4×4 clubs for some first-hand knowledge.
Put sliders at the top of your list of armor and you won’t regret it.

